NOTE: For pastures and grasslands, use the Turf Procedure.


| STEP 1: | Determine how many soil tests will be needed. Although one test can cover 100 acres, soil types are not usually that consistent. Smaller areas with similar drainage and soil characteristics will provide more targeted recommendations. |
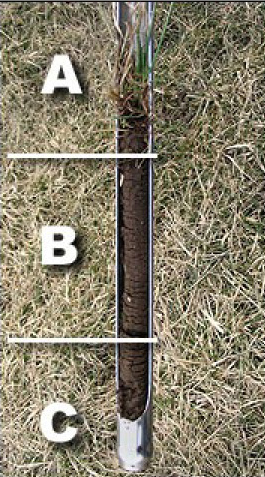
| STEP 2: | Use a soil profiler or other tool to obtain soil samples to the maximum depth possible. Twist probe and pull out of the ground. Measure from surface line to the bottom of probe, the bottom of area “C” on the photo. If using a trowel or shovel, attempt to create a flat surface that is perpendicular, removing the loose dirt out of the way so that it can be seen more from the side and to enable an accurate measure of the depth. Write down “Average Coring Depth” so that it can be transferred to the website form. |
| STEP 3: | Remove soil from the probe (or trowel) and discard any soil that is over 10″ deep, putting the top 10″ of soil in a sample bag. |
| STEP 4: | For large areas, take at least one (1) sample per acre and place the soil in a bucket. Mix thoroughly and place one cup of soil in a bag. For areas under one acre, take at least 6 samples and place one (1) cup of soil in a bag. |
| STEP 5: | Measure the area for which the sample was collected. |
| STEP 6: | Check off the watering method you use, if any. |
| STEP 7: | Date sample is taken and the last time lime or gypsum was applied. |
| STEP 8: | Transfer the data onto the Website Form. |
